READ THIS FIRST
This session has been designed as a linear journey in which you are expected to follow each step as closely as possible. However, i will not force you to do so. You are free to enjoy this session the way you want. But if you decide to move apart from the marked path, you will be on your own! I will concentrate my efforts towards the ones following the session the way it is intended to.
Have fun!
First Steps in the Web
Before diving into Scaja.JS, you need to get used to some of the Web basics. This section is dedicated to make you practice HTML, CSS, SVG and even JavaScript.
Slimetrail
- Recommended time to spend on this part: 5 minutes
- Recommended finishing before: 9:05am
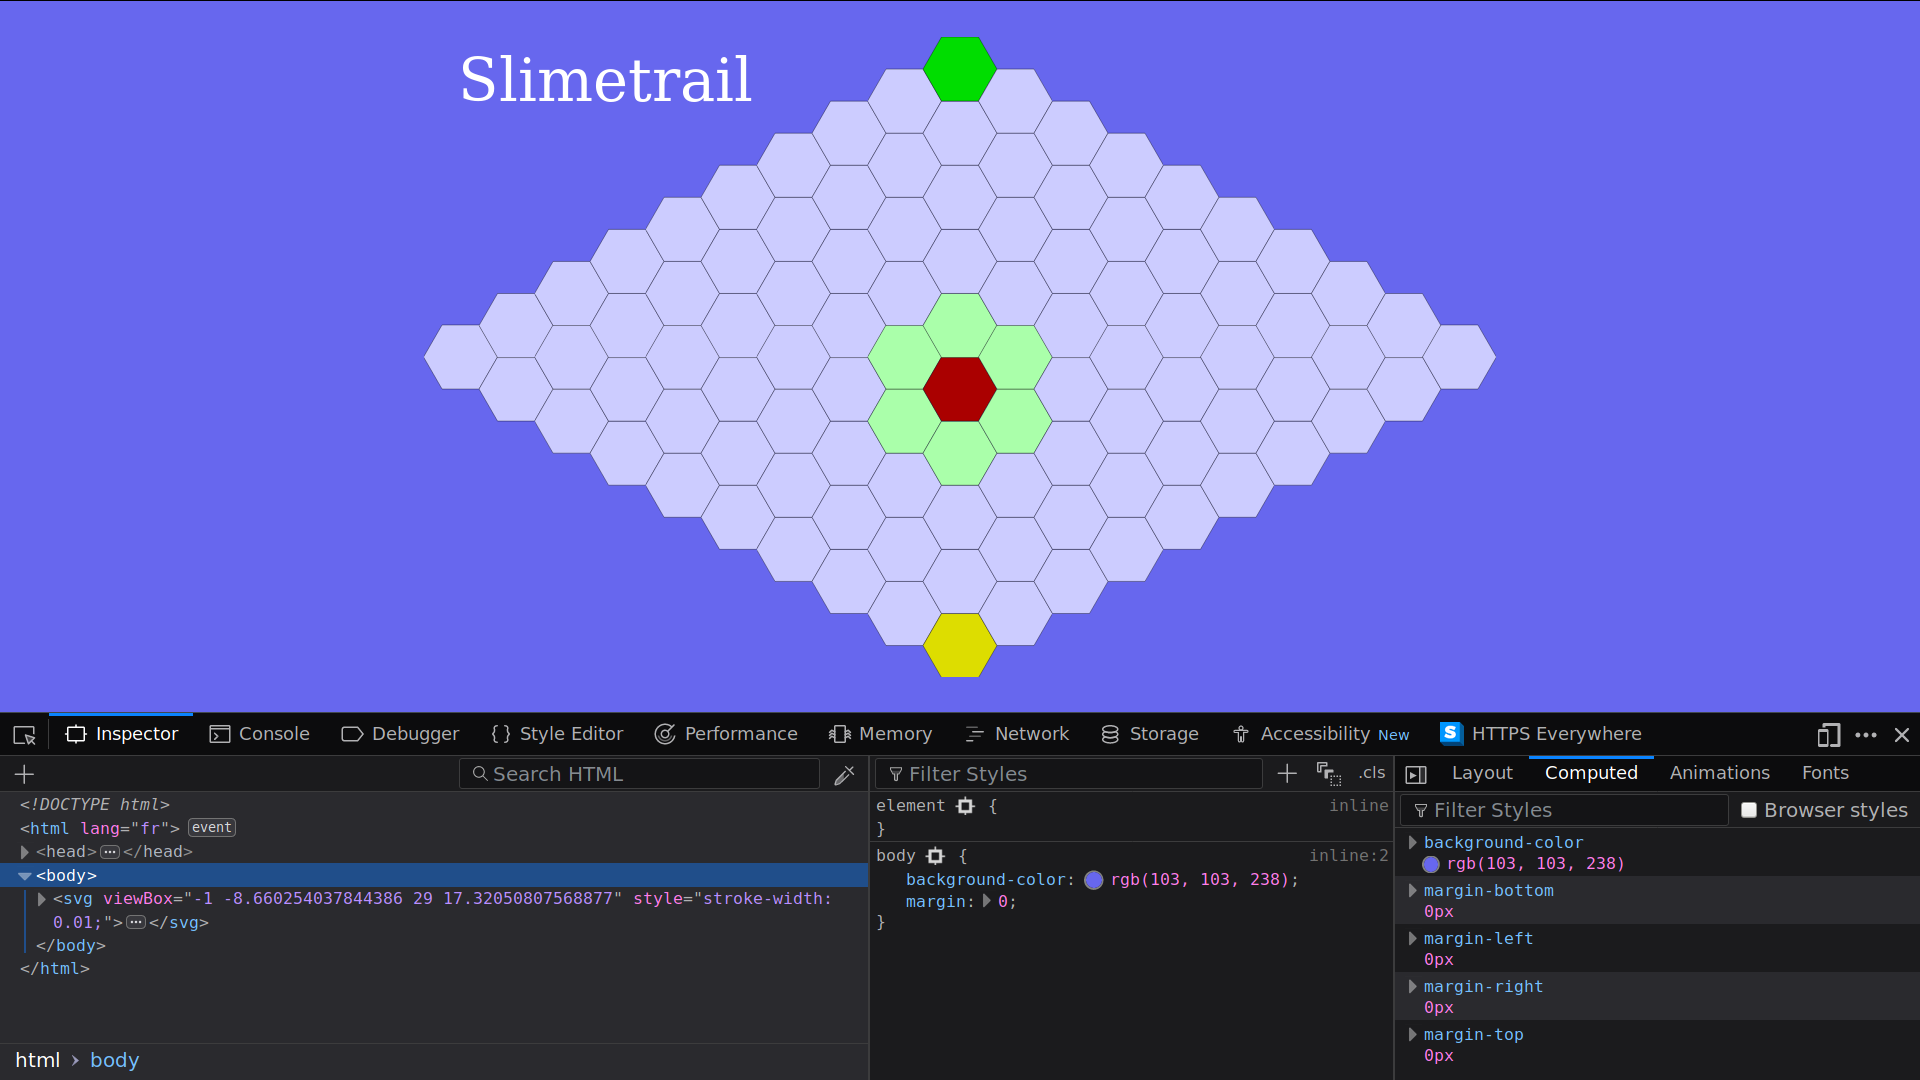
Slimetrail is a two-players turn-based board game. At the beginning of the game the board looks like this:
The red cell in the centre of the board is call the stone. Players, at their turn, move the stone to an adjacent cell. The goal of the green player is to put the stone in the top-most cell (the green cell) while the goal of the yellow player is to put the stone in the bottom-most cell (the yellow cell). The Allowed moves are indicated by a drawing cells in light green on first-player's turn and light yellow on second-player's one. The first player to reach his/her goal wins the game. Green player plays first.
Visit chrilves.github.io/slimetrail and take 5 minutes to play the game to get used to it.
Playing with the Document Object Model (DOM)
It is time to meet the DOM. First open the page chrilves.github.io/slimetrail on which you played in the last section. Then open the development tools. In Firefox, you can do so by opening the Web Developer -> Toggle Tools menu item. You should see something like this:

The bottom half of the screen is the Web Developer Tools.
The Inspector panel
- Recommended time to spend on this part: 10 minutes
- Recommended finishing before: 9:15am
The inspector shows you the HTLM/CSS/SVG code of the page in real time. JavaScript code can modify the HTLM/CSS/SVG code of the page through an API (Application Programming Interface) known as the Document Object Model or DOM for short.
- Play the game and watch the code of the page being modified as you play.
- Write down 10 modifications of the tree you noticed.
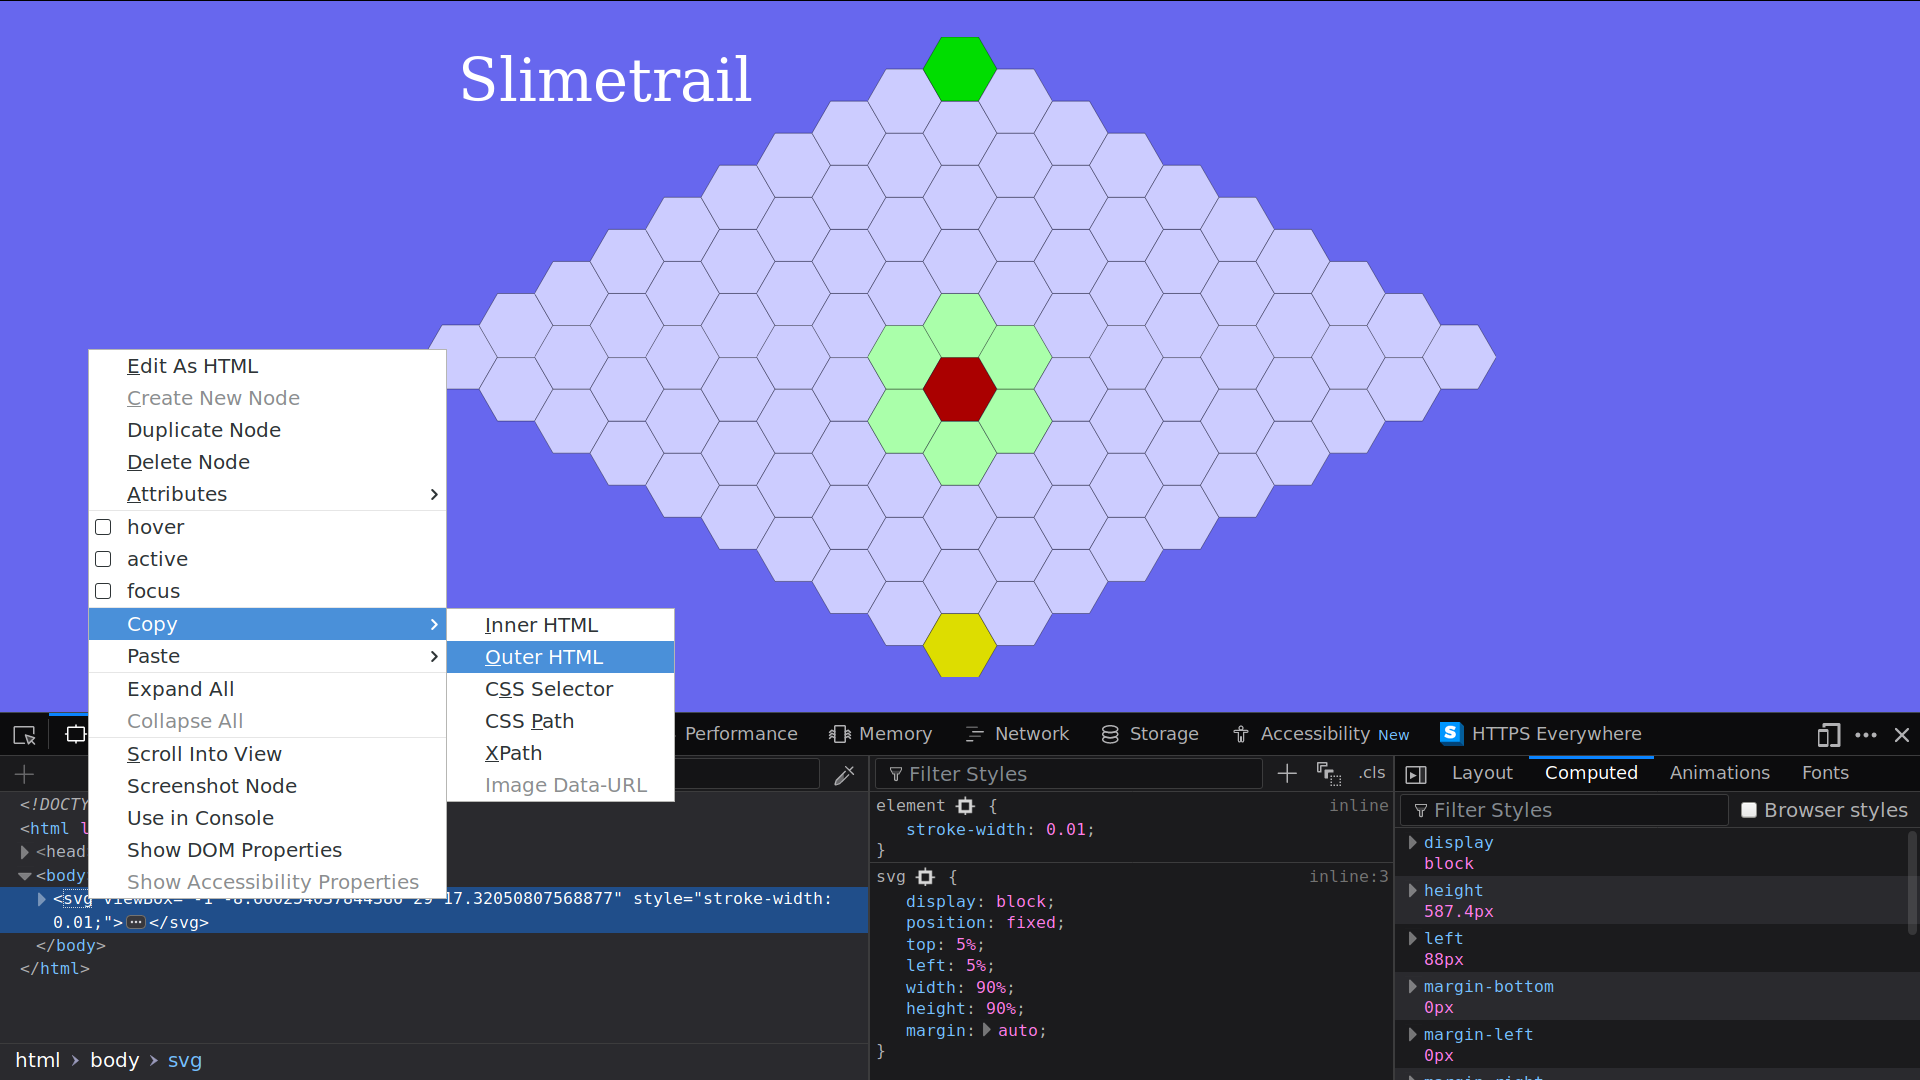
Within the inspector you can explore the structure of the document, but also modify it and even copying it.
- Select the
<svg ...>tag, then right-click and selectCopy -> Outer HTMLlike this:

- Paste it any text editor you like.
During this session, use the inspector often either to inspect a working example like the one at chrilves.github.io/slimetrail, or as a REPL by writing down HTML/CSS/SVG or as a debugger.
The console panel
- Recommended time to spend on this part: 30 minutes
- Recommended finishing before: 9:45am
The console panel is a JavaScript REPL. Enter the following JavaScript code and watch the effects on the page:
let x = "Welcome ";
x;
x = x + "to the console";
console.log(x);
document.body
        .appendChild(document.createTextNode("Hello"));
The structure of the page, exposed in the inspector panel, is (more or less) an XML tree made of Node. There are different kind of nodes such
as Text nodes which are leaves representing some text or Element nodes which represent an HTML or SVG tag such as div, span, body, svg and many others. As you can see in the inspector Element nodes can have sub-nodes that are called children and key/value pairs attached to them called Attributes. We will only use Text and Element nodes in this session.
One of the most important concept is the document, it represents the page. You can access it simply with document. It provides many of the main functions we will use:
-
document.getElementById get an
Elementnode by itsidattribute.Try the following code in the console. Observe the result and find the node in the inspector:
let rules = document.getElementById("rules"); rules; -
document.createTextNode creates a
Textnode but does not attach it to the page yet!Try the following code in the console. Observe the result and try to find it in the inspector:
let mytextnode = document.createTextNode("I am a text node"); mytextnode; -
element.appendChild add a node to the children of the element.
Try the following code in the console. What change do you see on the page? Find the
mytextnodein the inspector:rules.appendChild(mytextnode); -
element.replaceChild replace a node that is a child of the element by another node.
Try this in the console:
let mynewtextnode = document.createTextNode("I am the new text node");
rules.replaceChild(mynewtextnode, mytextnode);
Observe the effect on the page. Using the inspector, notice what happend.
-
document.createElementNS creates a new
Elementnode but does not attach it to the page yet. Note that this function requires an argument called the namespace. A tag may have several meaning depending on the context, how does the browser know how to interpret it? Take aaddresstag for example, is it a postal address? Or an email address maybe? To avoid ambiguity, we can make clear what is the meaning of a tag by defining its namespace. We will use two namespaces in this session:- The HTML namespace tells the browser the node is to be interpreted as an HTML node. Its value is
"http://www.w3.org/1999/xhtml". - The SVG namespace tells the browser the node is to be interpreted as an SVG node. Its value is
"http://www.w3.org/2000/svg".
Using the HTML namespace for a SVG node will result in the browser treating it as an HTML node and thus misbehaving. Be very careful about that, always give the correct namespace.
Try the following code in the console. Add the element to the page and observe the result in the inspector:
let myhtmlelement =
      document.createElementNS("http://www.w3.org/1999/xhtml", "h1");
myhtmlelement;
Try the following code in the console. Add the element to the page and observe the result in the inspector:
let mysvgelement = document.createElementNS("http://www.w3.org/2000/svg", "polygon"); mysvgelement; - The HTML namespace tells the browser the node is to be interpreted as an HTML node. Its value is
-
element.setAttributeNS set an attribute on the
element. Attributes can also have a namespace but unlike elements it is optional.Try the following code in the console. Observe the effects on
myhtmlelementin the inspector.myhtmlelement.setAttributeNS( undefined, "akey", "avalue"); myhtmlelement;myhtmlelement.setAttributeNS( undefined, "akey", "newvalue"); myhtmlelement;myhtmlelement.setAttributeNS( "http://www.w3.org/1999/xlink", "xlink", "anothervalue"); myhtmlelement; -
Node.parentNode returns the parent node if it exists.
Try the following code in the console. Find the parent node in the inspector.
let rulesParent = rules.parentNode; rulesParent; -
Node.addEventListener attach a reaction to an event on this node.
Try the following code in the console. Then click on the page to observe the result.
function reaction1(event) { alert("Event received and reaction triggered!"); } document.body.addEventListener("click", reaction1); -
Event.stopPropagation prevents further propagation of the current event in the capturing and bubbling phases.
function reaction2(event) { event.stopPropagation(); alert("Event received, reaction triggered but no further propagation!"); } document.body.addEventListener("click", reaction2); -
By default, JavaScript code in a page can be executed before the page is fully loaded. Code that need the page to be fully loaded can set themselves as an event listener on
documentfor the DOMContentLoaded event.function reaction3(event) { alert("I will be executed when the page is fully loaded"); } document.addEventListener("DOMContentLoaded", reaction3);
These are the few functions you need to use to create or modify the page structure from JavaScript.
Real-Life Application
- Recommended time to spend on this part: 10 minutes
- Recommended finishing before: 9:55am
It is about time to apply all this knowledge into a real-life example. To do so, create a new file named example.html whose content is:
<!DOCTYPE html>
<html>
  <head>
    <meta charset="UTF-8">
    <script type="text/javascript">
    /* Place here the code that create the svg tree
       and add it to the page so that the image is
       displayed by the browser.
    */
    </script>
  </head>
  <body>
  </body>
</html>
Write within the <script ...> tag above the JavaScript code to create the following complete Element and append it to the <body> node so that the browser displays the image. This example is taken from the book SVG Essentials.
<svg width="140"
     height="170"
     xmlns="http://www.w3.org/2000/svg"
     xmlns:xlink="http://www.w3.org/1999/xlink">

  <title>Cat</title>
  <desc>Stick Figure of a Cat</desc>

  <circle cx="70" cy="95" r="50" style="stroke: black; fill: none;"></circle>
  <circle cx="55" cy="80" r="5" stroke="black" fill="#339933"></circle>
  <circle cx="85" cy="80" r="5" stroke="black" fill="#339933"></circle>

  <g id="whiskers">
    <line x1="75" y1="95" x2="135" y2="85" style="stroke: black;"></line>
    <line x1="75" y1="95" x2="135" y2="105" style="stroke: black;"></line>
  </g>

  <use xlink:href="#whiskers" transform="scale(-1 1) translate(-140 0)"></use>

  <polyline points="108 62, 90 10, 70 45, 50, 10, 32, 62"
            style="stroke: black; fill: none;">
  </polyline>

  <polyline points="35 110, 45 120, 95 120, 105, 110"
            style="stroke: black; fill: none;">
  </polyline>
</svg>
Open the page in the browser, the inspector should be similar to:
<!DOCTYPE html>
<html>
  <head>
    <meta charset="UTF-8">
    <script type="text/javascript">
    /* Your Javascript code to create the following
       svg element should be here
    */
    </script>
  </head>
  <body>
    <svg width="140"
         height="170"
         xmlns="http://www.w3.org/2000/svg"
         xmlns:xlink="http://www.w3.org/1999/xlink">

      <title>Cat</title>
      <desc>Stick Figure of a Cat</desc>

      <circle cx="70" cy="95" r="50" style="stroke: black; fill: none;"></circle>
      <circle cx="55" cy="80" r="5" stroke="black" fill="#339933"></circle>
      <circle cx="85" cy="80" r="5" stroke="black" fill="#339933"></circle>

      <g id="whiskers">
        <line x1="75" y1="95" x2="135" y2="85" style="stroke: black;"></line>
        <line x1="75" y1="95" x2="135" y2="105" style="stroke: black;"></line>
      </g>

      <use xlink:href="#whiskers" transform="scale(-1 1) translate(-140 0)"></use>

      <polyline points="108 62, 90 10, 70 45, 50, 10, 32, 62"
                style="stroke: black; fill: none;">
      </polyline>

      <polyline points="35 110, 45 120, 95 120, 105, 110"
                style="stroke: black; fill: none;">
      </polyline>
    </svg>
  </body>
</html>
Introduction to ScalaJS
Do not start this section until you completed the last one!
The Slimetrail Text App
- Recommended time to spend on this part: 5 minutes
- Recommended finishing before: 10:00am
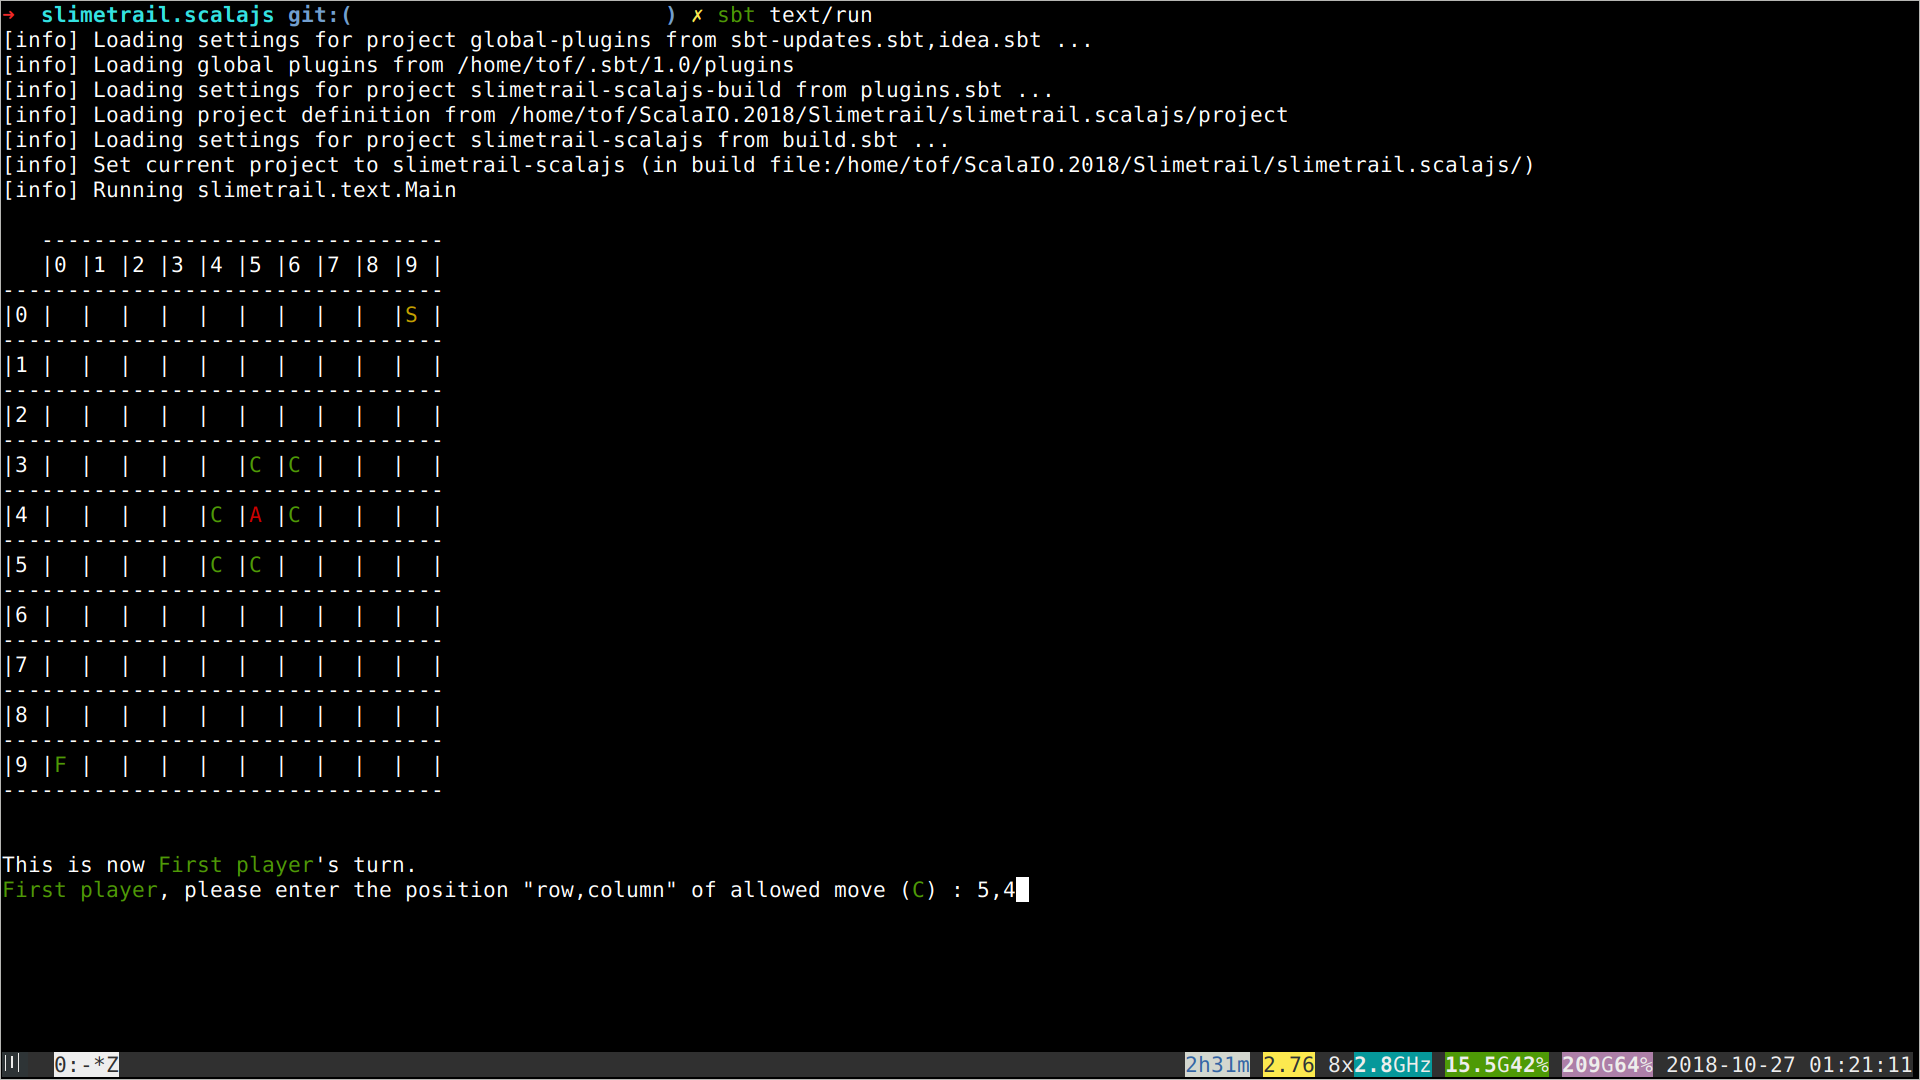
A text interface similar to the web one you used to far has been realized. To get it clone the following git repository:
git clone https://github.com/chrilves/slimetrail.scalajs.git -b ScalaIO.2018
cd slimetrail.scalajs
sbt text/run
You should see something like this:

The project is divided into three sbt modules:
textimplements the text user interface.slimetrailimplements the game's logic.toolboxdefines various useful things.
Do not modify any file under the toolbox, slimetrail and text directories!!!
Note that text does not include any game logic and slimetail does not include any interface code. This strict isolation is crucial to make things work.
Run the following commands to generate the scaladoc for the text, slimetrail and text projects.
sbt toolbox\docsbt slimetrail\docsbt text\doc
Now open the generated documentations in your browser.
The Game Loop
- Recommended time to spend on this part: 10 minutes
- Recommended finishing before: 10:10am
The execution of the game follows a simple and widespread technique:
- A data structure, the
GameState, represents the possible states of the game. - On every user
Action, the gameupdatethe current state to reflect the changes made by theAction. - On every state change, the game renders the new state on the screen.
More generally an application defines a type Model which represents the states the application can take. It also defines a type Msg which represents the events that make the application to transition from the current state to a new one. This new state is computed using the function update based on the current state model and the event message. The view function is responsible of rendering the current state on the screen and producing a message from user inputs.
All of this is summarized in the following two traits which represents an application. Take a close look at how the run procedure works.
trait Application {
  type Model
  val initialModel: Model

  type Msg

  def update(message: Msg, model: Model): Model
}

trait TextApplication extends Application {

  def view(model: Model): Msg

  final def run(): Unit = {
    @tailrec
    def loop(model: Model): Unit = {
      val msg: Msg = view(model)
      val nextModel: Model = update(msg, model)
      loop(nextModel)
    }

    loop(initialModel)
  }
}
The Slimetrail application is implemented by the class SlimetrailTextApp. Note that the Model is GameState and events are Action.
Inviting ScalaJS to the Party
For now Slimetrail is a plain old JVM-only project. We need to make it able to produce both JVM and JavaScript outputs: it will become a cross-project.
Cross-projectization
- Recommended time to spend on this part: 5 minutes
- Recommended finishing before: 10:15am
Add the following lines to project/plugins.sbt .
// ScalaJS
addSbtPlugin("org.portable-scala" % "sbt-scalajs-crossproject" % "0.6.0")
addSbtPlugin("org.scala-js" % "sbt-scalajs" % "0.6.25")
A large amount of Scala libraries are available both as JVM and ScalaJS artifacts. So will we! The Text UI needs the toolbox and slimetrail to be compiled for the JVM while the Web UI needs them to be compiled in JavaScript. Cross-projects can define libraryDependencies using %%% instead of %% to ensure the correct artifacts are fetched.
In build.sbt, replace any %% in commonSettings by %%% .
We now need to adapt the toolbox and slimetrail project definitions to define these as cross-projects. To do so:
-
At the beginning of
build.sbtadd these lines:// shadow sbt-scalajs' crossProject and CrossType until Scala.js 1.0.0 is released import sbtcrossproject.CrossPlugin.autoImport.{crossProject, CrossType} -
In the
toolbox, project definition, replaceprojectby:crossProject(JSPlatform, JVMPlatform) .crossType(CrossType.Pure) -
After the
toolbox, project definition, add:lazy val toolboxJS = toolbox.js lazy val toolboxJVM = toolbox.jvm -
In the
slimetrail, project definition, replaceprojectby:crossProject(JSPlatform, JVMPlatform) .crossType(CrossType.Pure) -
After the
slimetrail, project definition, add:lazy val slimetrailJS = slimetrail.js lazy val slimetrailJVM = slimetrail.jvm -
In the
text, project definition, replaceslimetrailbyslimetrailJVM.
toolbox and slimetrail projects now exists in two flavors each:
toolboxJVMandslimetrailJVMare JVM projects.toolboxJSandslimetrailJSare ScalaJS projects.
Run sbt text/run to ensure everything is still working fine.
Setting up the Web UI
- Recommended time to spend on this part: 5 minutes
- Recommended finishing before: 10:20am
Add the new project definition for the Web UI:
// Web Interface
lazy val web =
  project
    .in(file("web"))
    .enablePlugins(ScalaJSPlugin)
    .settings(commonSettings: _*)
    .settings(
      name := "slimetrail-web",
      libraryDependencies += "org.scala-js" %%% "scalajs-dom" % "0.9.6",
      scalaJSUseMainModuleInitializer := true
    )
    .dependsOn(slimetrailJS)
Create the file web/src/main/scala/Main.scala whose content is:
package slimetrail.web

import org.scalajs.dom._
import scala.scalajs.js
import slimetrail._

/** Tree strucure to represent the DOM */
sealed trait Html[+A] {
  final def render: Node =
    ??? // Replace by actual code

  final def map[B](f: A => B): Html[B] =
    ??? // Replace by actual code
}
final case class ATextNode(value: String) extends Html[Nothing]
final case class AnElement[+A](
    namespace: String,
    tag: String,
    attributes: Map[(Option[String], String), String],
    eventListeners: List[(String, js.Function1[_ <: Event, A])],
    children: List[Html[A]]
  ) extends Html[A]

/** Generic Web Application */
trait WebApplication extends Application {

  def view(model: Model): Html[Msg]

  final def run(initialNode: Node): Unit =
    ??? // Replace by actual code
}

/** The Slimetrail Web Application */
final class SlimetrailWebApp(size: Int)
    extends SlimetrailApp(size)
    with WebApplication {

  def view(m: GameState): Html[Msg] =
    ??? // Replace by actual code
}

object Main {
  def onLoading(a: => Unit): Unit =
    document.addEventListener("DOMContentLoaded", (_: Event) => a)

  def main(args: Array[String]): Unit =
    onLoading {
      new SlimetrailWebApp(10)
        .run(document.getElementById("scalajs-controlled-node"))
    }
}
The WebApplication trait is the exact Web counterpart of the TextApplication trait. The view method of WebApplication, just like in TextApplication, takes the current state of the application (GameState for Slimetrail) as input and produce events (Action for Slimetrail) that will be sent to update in order to compute the new state of the application and so on.
The two differences with TextApplication are:
- the Web UI needs to render some HTML/SVG/CSS in a browser page via the DOM instead of lines of text in a terminal console.
- the Web UI needs to produce user
Actionfrom DOM Events instead of reading lines from the keyboard.
To produce the JavaScript you have two options:
sbt web/fastOptJSwill compile thewebproject into aJavaScriptfile atweb/target/scala-2.12/slimetrail-web-fastopt.jsfast but without much optimizations.sbt web/fullOptJSwill compile thewebproject into an optimizedJavaScriptfile atweb/target/scala-2.12/slimetrail-web-opt.js.
Run bin/genHtml.sh to produce both fast.html and full.html which run the application using the corresponding JavaScript file.
Implementing the Web UI
- Recommended time to spend on this part: 1 hour and 40 minutes
- Recommended finishing before: 12:00am
Using the ScalaJS library scaladoc and ScalaJS DOM scaladoc you can now finish the Web UI by implementing the following functions:
-
(Optional) Implements
Html.map.It applies the function
fon any value of typeA. -
Implements
Html.render.It creates a new Node corresponding to this HTML/SVG tree using the DOM.
-
Implements
WebApplication.run.It runs a Web Application by replacing the
initialNodeby the rendering of the current state of the application. -
Implements
SlimetrailWebApp.view.It renders the current state of the Slimetrail application as an
Html[Action]tree.
